Bindless Texture
Bindless texture 允许 shader 直接通过 integer handle, (从SSBOs中)访问大量 textures, 而无需 bind texture unit.
Overview
OpenGL 4.5 只有至少 16 个 texture units 可供 shader 使用 (即使许多驱动支持 32 个或更多)。
因此这个限制让我们很难处理如 merge many different draw calls with different material textures,或者在延迟光照阶段访问许多阴影贴图的事情。
过去有两种主要方法可以解决这个问题:
- Use array textures to combine multiple textures of the same dimensions
- Use texture atlases to allow one large texture to represent many smaller textures
Bindless textures 是第三种替代方案。bindless textures 允许我们手动将 texture 标记为驻留(resident)在 GPU 上,然后使用 UBO 或 SSBO 将其 handle 传递给 shader,而不是将 texture 显式绑定到 texture unit。
这种方法还可能提高性能。如果您的渲染器花费了大量时间在不同 drawcall 之间 bind/unbind textures,那 bindless 方法可大量减少驱动程序开销。
这是因为你可以在帧开始时确定需要哪些textures,将它们全部标记为 同时resident驻留,然后将这些textures用于帧其余部分的任意数量的drawcalls。
Downside of Bindless Texure
有两个主要缺点:
- RenderDoc 届时还不支持它们,因此您需要使用支持的图形debugger,例如 Nvidia NSight
- Bindless texure 从未成为 OpenGL 的核心,因此即使在 4.6 中它仍然是一个扩展。
NVIDIA 和 AMD 都有很多完全支持它的硬件,但您仍需要仔细检查 vendor 是否支持它。
API Overview
我们将重点关注三个主要的 API 函数
Retrieving Texture Handles
GLuint64 glGetTextureHandleARB(GLuint texture);这个函数的作用是接收一个有效的纹理,并返回一个表示该纹理的 64 位句柄。这个句柄可以直接插入到 UBO 或 SSBO 中。
如果你多次使用同一个纹理调用这个函数,它将始终返回相同的句柄。因此,你可以在纹理创建后调用一次此函数,然后在纹理的整个生命周期中使用这个句柄,而无需再次调用此函数。
INFO
Khronos 在他们的 Wiki 中声明:一旦为texture/sampler创建了handle,其状态就不能再更改。
对于 Buffer Textures,这包括当前附加到它的 buffer object(这也意味着你不能为没有附加 buffer 的 buffer texture 创建 handle)。
不仅如此,在这种情况下,buffer object 本身也会变得不可变;它不能通过 glBufferData 重新分配。不过与 texture 一样,其存储仍然可以 mapped,并且其数据可以通过其他函数正常修改。”
因此,一般的指导原则是,在为 texture 或 buffer texture 执行所有初始设置后,调用此函数。从那时起,你将只能更改 texture data,而不能更改与纹理相关的其他状态。
Making Texture Handles Resident (and Non Resident)
// handle is what is returned by glGetTextureHandleARB
void glMakeTextureHandleResidentARB(GLuint64 handle);由于我们不再绑定到 uniform texture units,因此我们需要在使用 handle 之前告诉驱动程序我们打算使用哪些 handles。否则,它将无从知晓。
一旦使一个纹理句柄驻留,它将保持驻留状态,直到你显式地告诉驱动程序使其非驻留。这意味着,如果你有一组将在程序的整个生命周期中存在的纹理,你可以在程序开始时使它们驻留,并在程序结束前保持其驻留状态。
// handle is what is returned by glGetTextureHandleARB
void glMakeTextureHandleNonResidentARB(GLuint64 handle);这个函数允许你告诉驱动程序,该句柄不再被任何 shader 使用,可以将其从驻留列表中移除。
Example: 1600 textures in a single shader
为了展示如何使用这些功能,我们将随机生成1600个textures(每个cube实例一个),并使它们都驻留以供shader使用。我们只会使用一个 instanced draw call 来绘制1600个cubes。
1. Cube VertexData & Transforms in SSBOs
首先,我们将生成cube的顶点数据,并插入到一个 SSBO 中。
struct VertexData {
    float position[3];
    float uv[2];
    float normal[3];
};

// In main or some other function
std::vector<VertexData> vertices;
// ... code to insert a single cube data into vertices ...

const int numVertices = data.size();
GLuint verticesBuffer;

glCreateBuffers(1, &verticesBuffer);
glNamedBufferStorage(
    verticesBuffer,
    sizeof(VertexData) * vertices.size(),
    (const void *)vertices.data(),
    GL_DYNAMIC_STORAGE_BIT
);接下来,我们将创建1600个不同的transforms,每个cube实例一个。这些transforms也将被插入到一个SSBO中。
std::vector<glm::mat4> instancedMatrices;

// Each one will be 5 units apart from the others in the x/y direction
for (size_t x = 0; x < 200; x += 5) {
    for (size_t y = 0; y < 200; y += 5) {
        glm::mat4 mat(1.0f);
        mat[3].x = float(x);
        mat[3].y = float(y);
        mat[3].z = 0.0f;
        instancedMatrices.push_back(std::move(mat));
    }
}

const int numInstances = instancedMatrices.size();
GLuint modelMatricesBuffer;

glCreateBuffers(1, &modelMatricesBuffer);
glNamedBufferStorage(
    modelMatricesBuffer,
    sizeof(glm::mat4) * instancedMatrices.size(),
    (const void *)instancedMatrices.data(),
    GL_DYNAMIC_STORAGE_BIT
);2. Creating Textures & Retrieving Handles
然后我们随机生成1600个textures。 我们将为textures和返回的handles创建两个列表。
std::vector<GLuint> textures;
std::vector<GLuint64> textureHandles;

// Each texture has a width and height of 32x32,
// with 3 channels of data (RGB) per pixel
const size_t textureSize = 32 * 32 * 3;
unsigned char textureData[textureSize];Generating Textures And Retrieving Handles
for (int i = 0; i < numInstances; ++i) {
    const unsigned char limit = unsigned char(rand() % 231 + 25);
    // Randomly generate an unsigned char per RGB channel
    for (int j = 0; j < textureSize; ++j) {
        textureData[j] = unsigned char(rand() % limit);
    }

    GLuint texture;
    glCreateTextures(GL_TEXTURE_2D, 1, &texture);
    glTextureStorage2D(texture, 1, GL_RGB8, 32, 32);
    glTextureSubImage2D(
        texture,
        // level, xoffset, yoffset, width, height
        0, 0, 0, 32, 32,
        GL_RGB, GL_UNSIGNED_BYTE,
        (const void *)&textureData[0]);
    glGenerateTextureMipmap(texture);

    // Retrieve the texture handle after we finish creating the texture
    const GLuint64 handle = glGetTextureHandleARB(texture);
    if (handle == 0) {
        std::cerr << "Error! Handle returned null" << std::endl;
        exit(-1);
    }

    textures.push_back(texture);
    textureHandles.push_back(handle);
}需要进行某种检查以确保返回的handle实际上是有效的。如果出现问题,它将返回0。
3. Packing Handles into SSBO
接下来,我们需要将所有的texture handles打包到另一个SSBO中。
GLuint textureBuffer;
glCreateBuffers(1, &textureBuffer);
glNamedBufferStorage(
    textureBuffer,
    sizeof(GLuint64) * textureHandles.size(),
    (const void *)textureHandles.data(),
    GL_DYNAMIC_STORAGE_BIT
);一旦完成所有这些步骤,我们就可以进入渲染循环了!
4. Making Handles Resident and Drawing
glEnable(GL_DEPTH_TEST);
glClearColor(0.0f, 0.0f, 0.0f, 0.0f);
glClear(GL_COLOR_BUFFER_BIT | GL_DEPTH_BUFFER_BIT);

// Mark all as resident
for (GLuint64 handle : textureHandles) {
    glMakeTextureHandleResidentARB(handle);
}

// Bind our shader program
glUseProgram(shader);

// Set up matrices
glUniformMatrix4fv(
    glGetUniformLocation(shader, "projection"), 1, GL_FALSE, projectionMat
);
glUniformMatrix4fv(
    glGetUniformLocation(shader, "view"), 1, GL_FALSE, viewMat
);

// Bind the SSBOs
glBindBufferBase(GL_SHADER_STORAGE_BUFFER, 0, verticesBuffer);
glBindBufferBase(GL_SHADER_STORAGE_BUFFER, 1, modelMatricesBuffer);
glBindBufferBase(GL_SHADER_STORAGE_BUFFER, 2, textureBuffer);

glDrawArraysInstanced(GL_TRIANGLES, 0, numVertices, numInstances);

glUseProgram(0);

// Mark all as non-resident - can be skipped if you know the same textures
// will all be used for the next frame
for (GLuint64 handle : textureHandles) {
    glMakeTextureHandleNonResidentARB(handle);
}5. A Look at the Shaders
vertex shader几乎与Programmable Vertex Pulling文章中的shader相同,唯一的区别是现在它将gl_InstanceID作为输出,以便fragment shader可以使用它。在这种情况下,gl_InstanceID将包含从0到1599的值,fragment shader将使用它来确定应该从哪个texture中提取数据。
另一个非常重要的事情是记得在shader中使用#extension GL_ARB_bindless_texture : require,因为bindless textures没有被纳入OpenGL核心标准。我们需要在vertex shader和fragment shader中都加上这一行指令。
vertex shader:
#version 460 core

#extension GL_ARB_bindless_texture : require

// This matches the C++ definition
struct VertexData {
    float position[3];
    float uv[2];
    float normal[3];
};

// readonly SSBO containing the data
layout(binding = 0, std430) readonly buffer ssbo1 {
    VertexData data[];
};

layout(binding = 1, std430) readonly buffer ssbo2 {
    mat4 modelTransforms[];
};

uniform mat4 projection;
uniform mat4 view;

// Helper functions to manually unpack the data into vectors given an index
vec3 getPosition(int index) {
    return vec3(
        data[index].position[0],
        data[index].position[1],
        data[index].position[2]
    );
}

vec2 getUV(int index) {
    return vec2(
        data[index].uv[0],
        data[index].uv[1]
    );
}

vec3 getNormal(int index) {
    return vec3(
        data[index].normal[0],
        data[index].normal[1],
        data[index].normal[2]
    );
}

smooth out vec2 fsUv;
flat out vec3 fsNormal;
flat out int fsInstance;

void main()
{
    mat4 vp = projection * view;
    vec4 position = vec4(getPosition(gl_VertexID), 1.0);
    gl_Position = vp * modelTransforms[gl_InstanceID] * position;

    fsUv = getUV(gl_VertexID);
    fsNormal = getNormal(gl_VertexID);
    // Fragment shader needs this to select one of the 1600 available textures
    fsInstance = gl_InstanceID;
}在下面的fragment shader中,你会注意到 readonly 的 SSBO 内部使用了 sampler2D 类型。根据你使用的texture类型,这里可以使用 sampler2D、sampler3D、samplerCube 等。所有这些类型只需要将 64 位的handles作为SSBO数据传入即可。
#version 460 core

#extension GL_ARB_bindless_texture : require

// SSBO containing the textures
layout(binding = 2, std430) readonly buffer ssbo3 {
    sampler2D textures[];
};

smooth in vec2 fsUv;
flat in vec3 fsNormal;
flat in int fsInstance;

out vec4 color;

void main() {
    // Select texture based on instance
    sampler2D tex = textures[fsInstance];
    // Read from the texture with the normal texture() GLSL function
    color = vec4(texture(tex, fsUv).rgb, 1.0);
}运行结果: 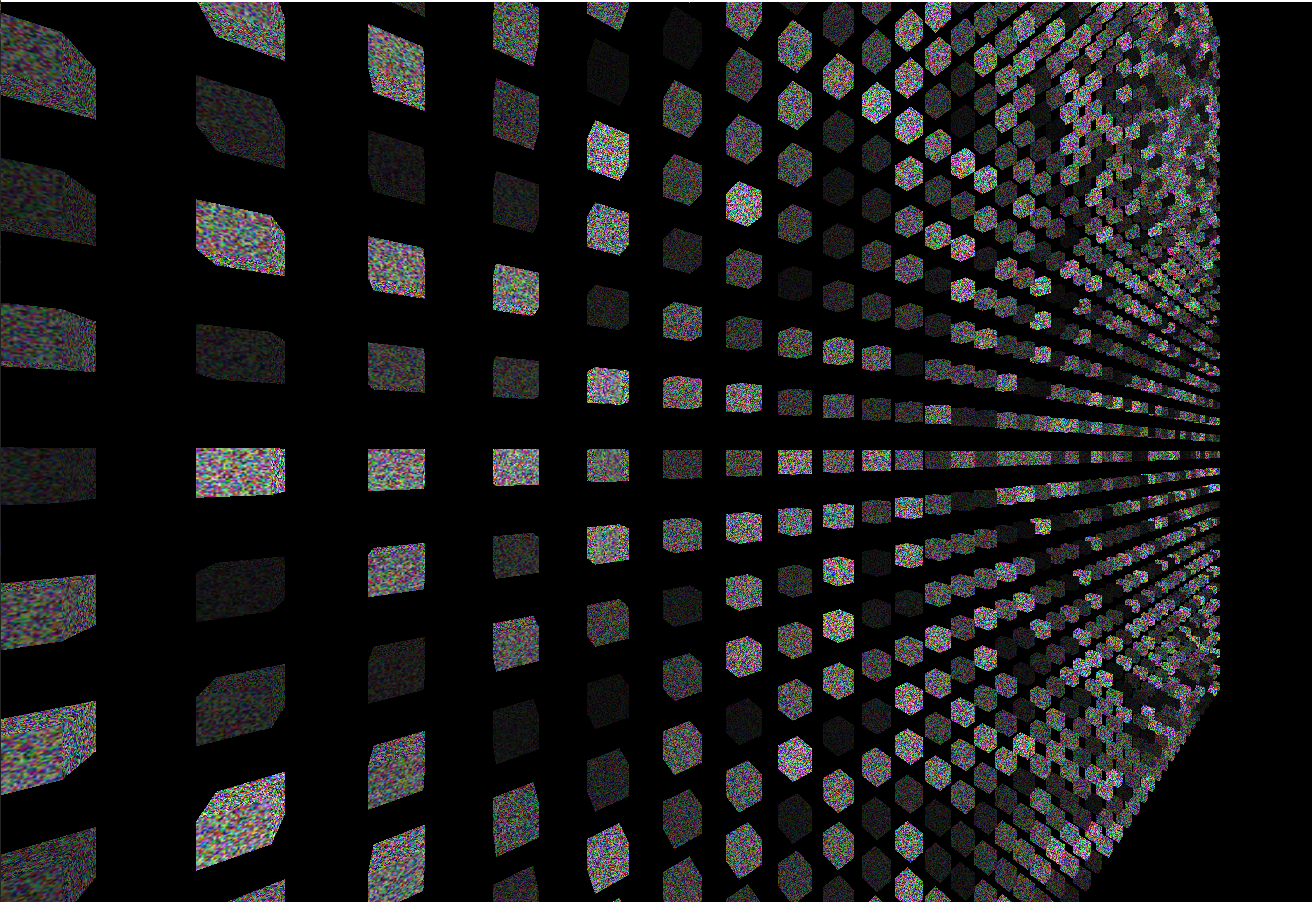 image from ktstephano
Appendix
About Dynamically Uniform Expressions
For information on what dynamically uniform expressions are, see.
在上面的shader中,我们通过 flat in int fsInstance 中的值来提取texture。由于我们使用相同的 draw command 绘制多个 instances,这并不是一个 dynamically uniform expression. 某些硬件支持这种用法,例如我使用的GTX 1060支持它,除了bindless扩展之外不需要其他扩展。
但在其他硬件上,这可能会导致严重的问题,因为访问texture的代码路径需要是 dynamically uniform 动态统一的。这里有两个主要的解决方法:
- 切换到Multi-Draw Indirect (MDI) 并利用
gl_DrawID,它可以确保是动态统一的。 在这种设置下,代替多个cube实例,你将记录1600个绘制命令,以便在执行某个命令时,gl_DrawID 设置为 [0, 1600) 的值。 - 在bindless的基础上添加其他扩展。对于Nvidia(如果需要),你可以添加
#extension GL_NV_gpu_shader5 : require。
对于AMD(如果需要),你可以添加#extension GL_EXT_nonuniform_qualifier : require。
(Special thanks to Jake Ryan over at https://juandiegomontoya.github.io/modern_opengl.html for pointing this out)
uint64_t handle as uvec2 to sampler
在使64位的texture handle驻留后,可以将该texture作为 uvec2 数组传入,而不是显式的 sampler2D。以下是从上述链接修改的简短示例:
#version 460 core
#extension GL_ARB_bindless_texture : enable

layout (location = 1) uniform uvec2 albedoHandle;

layout (location = 2) in vec2 fsTexCoord;

void main() {
    const bool hasAlbedo = (albedoHandle.x != 0 || albedoHandle.y != 0);
    vec4 color = vec4(0.1, 0.1, 0.1, 1);
    if (hasAlbedo) {
        // Notice the cast to sampler2D from the uvec2 handle
        color = texture(sampler2D(albedoHandle), fsTexCoord).rgba;
    }

    ... rest of shader ...
}(Special thanks to Jake Ryan over at https://juandiegomontoya.github.io/modern_opengl.html for suggesting this example)
Conclusion
Bindless textures 是一种非常强大的工具,能够增加shader可以访问的textures数量。 它补充了使用texture arrays或texture atlases的旧方法,对于那些在绘制调用之间花费大量时间绑定/解绑textures的程序,它可以带来显著的性能提升。
主要的缺点包括:
- 它并不是GL 4.6的核心部分,
- 不是所有的图形debugger都支持它,
- 除了Nvidia和AMD这两家对bindless支持较强的厂商外,并不是所有供应商(特别是移动设备)都支持它。